Administration
When the admin role is assigned to a user in the AST Control Panel, they gain access to the "Admin" menu. This menu provides various administrative functionalities, including user management, system metrics, health status, log management, application configuration, database management and API documentation.
You can access the menu by clicking the cogwheel icon in the upper right corner of the control panel interface:

After clicking the icon, you will be redirected to the admin page where you can use the navigation panel on the left side to access different administrative functionalities.
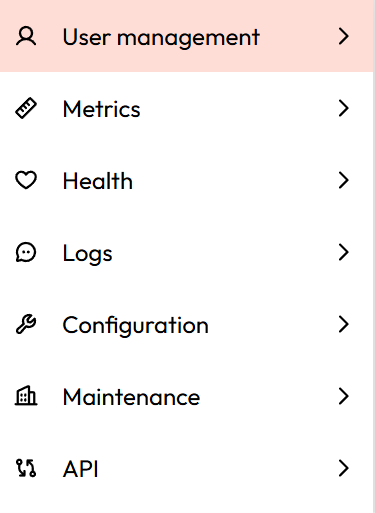
User management
As an administrator, you can access the User Role Maintenance to change roles of other existing users, delete them, or create new users and assign them a password and roles.
Info
The user management section is disabled if the Keycloak SSO authentication is enabled. In this case, user management is handled by Keycloak and not by the AST Control Panel. For more information on Keycloak SSO authentication, please refer to the Keycloak setup documentation.

To create a new user, click the New User button. To edit details of the current user, click the row in the table and a user details dialog will open where you can edit.
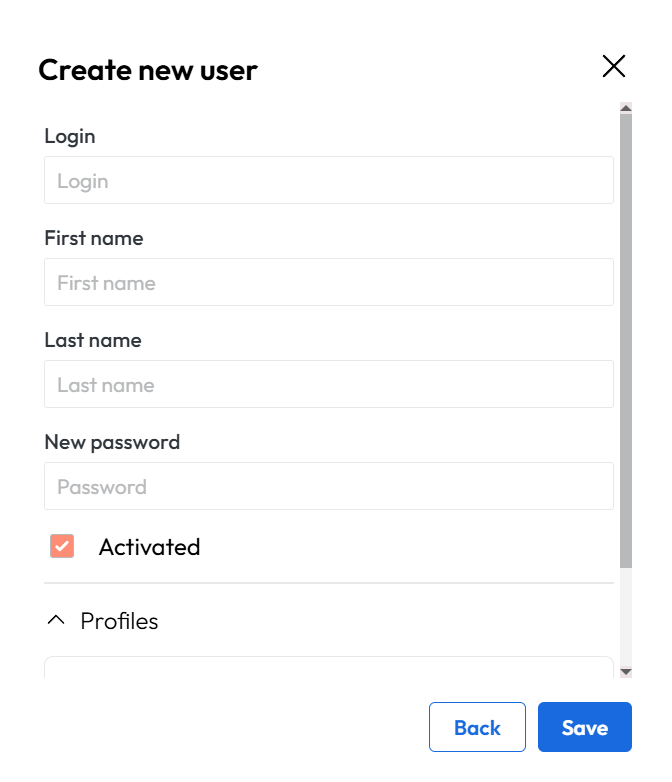
This view allows an administrator to define login credentials and assign access roles (e.g., ROLE_ADMIN, ROLE_USER) for the control panel. Each role will have access to the corresponding view.
| Role type | Rights |
|---|---|
| ROLE_USER | User can display reports and run test cases, modify/create test cases and sets. Admin operations not available |
| ROLE_ADMIN | Administrative role, all rights assigned |
Important
Admin user needs to have ROLE_USER and ROLE_ADMIN (both) assigned as rights.
To modify user information and roles click on the row in the user table. A user modification dialog will then appear.
To delete a user use the trash bin icon in the user table or the delete button in the edit dialog.
Info
Deleted users will appear as !user#
After logging in, you are navigated to the landing page where you will find options on the navigation panel to access test cases and other features.
Metrics
The Metrics tab provides an overview of the system's performance and usage statistics. It includes JVM metrics, HTTP request metrics, threads and other relevant performance indicators. This information can be useful for monitoring the health of the application and identifying potential issues.
Health
The Health tab displays the current health status of the application and its components.
Logs
The Logs tab allows you to view and manage application logs. You can set log levels (e.g., TRACE, DEBUG, INFO, WARN, ERROR, OFF) for different package namespaces. This is useful for troubleshooting and monitoring the application's behavior.
Warning
Setting log levels to DEBUG or TRACE in production can impact performance and generate large volumes of log output. Use verbose log levels sparingly.
Info
Log level changes are applied at runtime and do not persist across application restarts.
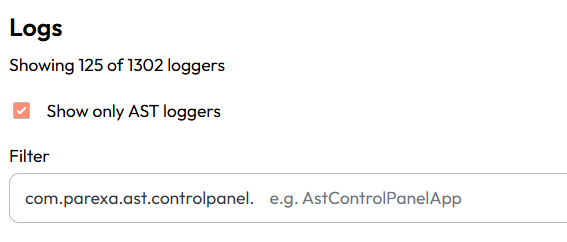
By default, only the application logs under 'com.parexa.ast.controlpanel' package name are visible. You can search this package namespace by adding more specific packages or classes within this namespace. It is also possible to disable the application log filter (by unchecking the 'Show only AST loggers' option), which will display all available logs.
Configuration
The Configuration tab provides access to the application's configuration properties. You can also upload and download some necessary files for the application, such as ast.properties file etc.
In the configuration files you can set up files necessary for the application:
| File | Description |
|---|---|
| ast.properties | Main configuration file for the application where you can set up various properties for the application, such as the Avaloq connection details etc. |
| ast.license | License file for the application, without a valid file the tests will not execute. |
| ast.globalsettings | Global settings file where you can set up the business user. |
| report_template_for_html_report.xslt | XSLT file used for transformation of XML report to HTML report. You can customize the HTML report by changing this file. |
| report_template_for_excel_report.xls | Excel template used for transformation of XML report to Excel report. You can customize the Excel report by changing this file. |
For file contents and examples, see Configuration files.
In the application configuration section you can set up various properties:
| Property | Description |
|---|---|
| Web domain | Web domain for project. |
| Core properties file path | Path to the ast.properties file if you would decide to mount it to the image. For more details on how to mount this file see Mounting of ast.properties section. |
| Max parallel processes | The number of maximum parallel processes for test execution. This is used to limit the number of parallel executions that can be run at the same time. If the number of scheduled executions exceeds this number, the additional executions will be queued until a slot is available. |
| Alm enabled | Flag to enable or disable the ALM integration. If set to true, more options will be available in the configuration for ALM integration. For more details on ALM integration see ALM integration documentation. |
| Xray enabled | Flag to enable or disable the Xray integration. If set to true, more options will be available in the configuration for Xray integration. For more details on Xray integration see Xray integration documentation. |
| Header color | Property to set up the color of the ribbon under the header in the control panel. You can choose from 6 predefined header ribbon colors. |
The input fields are populated with the default values at the start. Default values are set up in the application database.
Writing into the input fields and pressing the Save Changes button saves currently filled in values.
Maintenance
The Maintenance tab provides access to database management functionalities. You can perform database housekeeping by deleting old test executions and reports. This helps to keep the database clean and maintain optimal performance. The interface allows you to select a date and delete all executions and reports that were executed before the selected date.
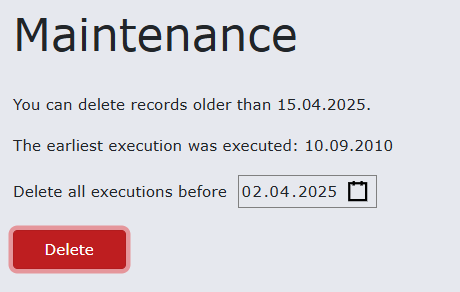
You can see the date of the earliest execution which helps you to orient yourself in the database and decide which executions to delete.
The latest date that can be selected for deletion is also displayed. This date is calculated based on the environment variable ast-control-panel.maintenance.execution-info-forced-retention-period.
Default is for 1 year, which means that you cannot delete executions that are newer than 1 year. This is to prevent accidental deletion of recent executions. It accepts the ISO 8601 duration format.
Info
Use only the duration part, for example P6M for 6 months, P1Y for 1 year, P15D for 15 days etc. Do not use time designators, such as T, H, M, S etc. because they are not supported in this context.
The executions are deleted in batches, so you can select the batch size for deletion. Default is 1000 executions per batch. If there are more executions to delete than the selected batch size, the deletion will be performed in multiple batches until all selected executions are deleted.
This is configurable via the environment variable ast-control-panel.maintenance.max-executions-to-delete-per-batch. Info on setting up environment variables can be found here.
After selecting the date you can press the delete button then a confirmation dialog will be displayed which informs you about the number of executions that will be deleted and the date before which the executions will be deleted. After confirming the deletion, the deletion process will start and you will see a progress bar with the progress of the deletion.
Important
Deletion of executions is irreversible, so please be careful when selecting the date and confirming the deletion. Once the deletion process is started it cannot be stopped, so make sure that you have selected the correct date before confirming the deletion.
During the deletion process another deletion cannot be started either via the UI or the API. You will have to wait until the current deletion process is finished. This is to prevent conflicts and ensure data integrity during the deletion process.
The deletion process is performed asynchronously in the background, so you can continue using the control panel while the deletion is in progress.
Info
We recommend performing deletions of smaller date ranges (1 week, 1 month) at the start so you can get a feeling of how many executions are being deleted and how long the deletion process takes. Then you can select larger date ranges for deletion if needed. Using this first on dev environment is also recommended before using it on production environment for the first time.
API
The API tab provides access to the REST API documentation and allows you to test API endpoints directly from the control panel.
The API specification contains only a subset of useful endpoints to increase readability and reduce the complexity of the specification.