Jira Xray
This chapter explains how to set up the AST Control Panel to integrate with Jira using the Xray test management app. This integration allows you to link your automated test cases to external IDs, track execution results, and view synchronization status and logs directly from AST.
Configuration Settings
To enable the integration, an administrator must navigate to the application properties in the AST Control Panel:
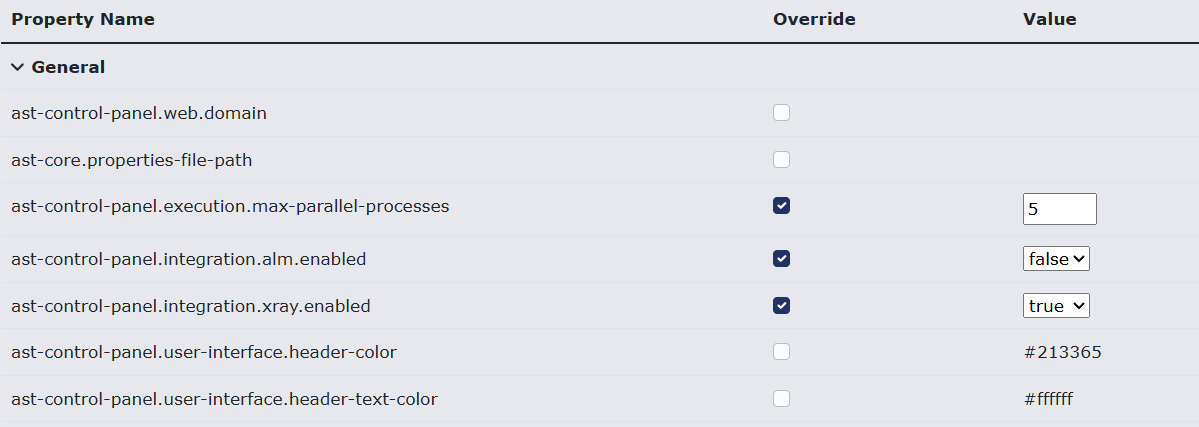
- Enable Integration: Ensure that the property
ast-control-panel.integration.xray.enabledis set to true. - Enter Connection Details: Input the required Xray configuration parameters, such as the URL and JWT token.

Setting Environment Variables (Optional)
If needed, the Xray sync endpoint can be adjusted by setting the environment variable AST_CONTROL_PANEL_XRAY_SYNC_ENDPOINT to the desired URL.
The default value for this variable is /rest/raven/2.0/import/execution.
If your Xray instance uses a different endpoint, you can set the environment variable accordingly. For instructions on how to set environment variables please refer to the Setting environment variables documentation.
Assigning External XRAY IDs to Test Cases
You must link your AST test cases to their corresponding Xray test entities in Jira by assigning an External Xray ID.
Individual Assignment
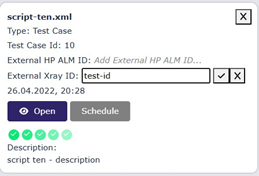
- Go to the Test tab and select a test case to open its details shown in the details panel.
- Use the field in the detail view to assign or edit the XRAY.
Bulk Assignment (CSV Upload)
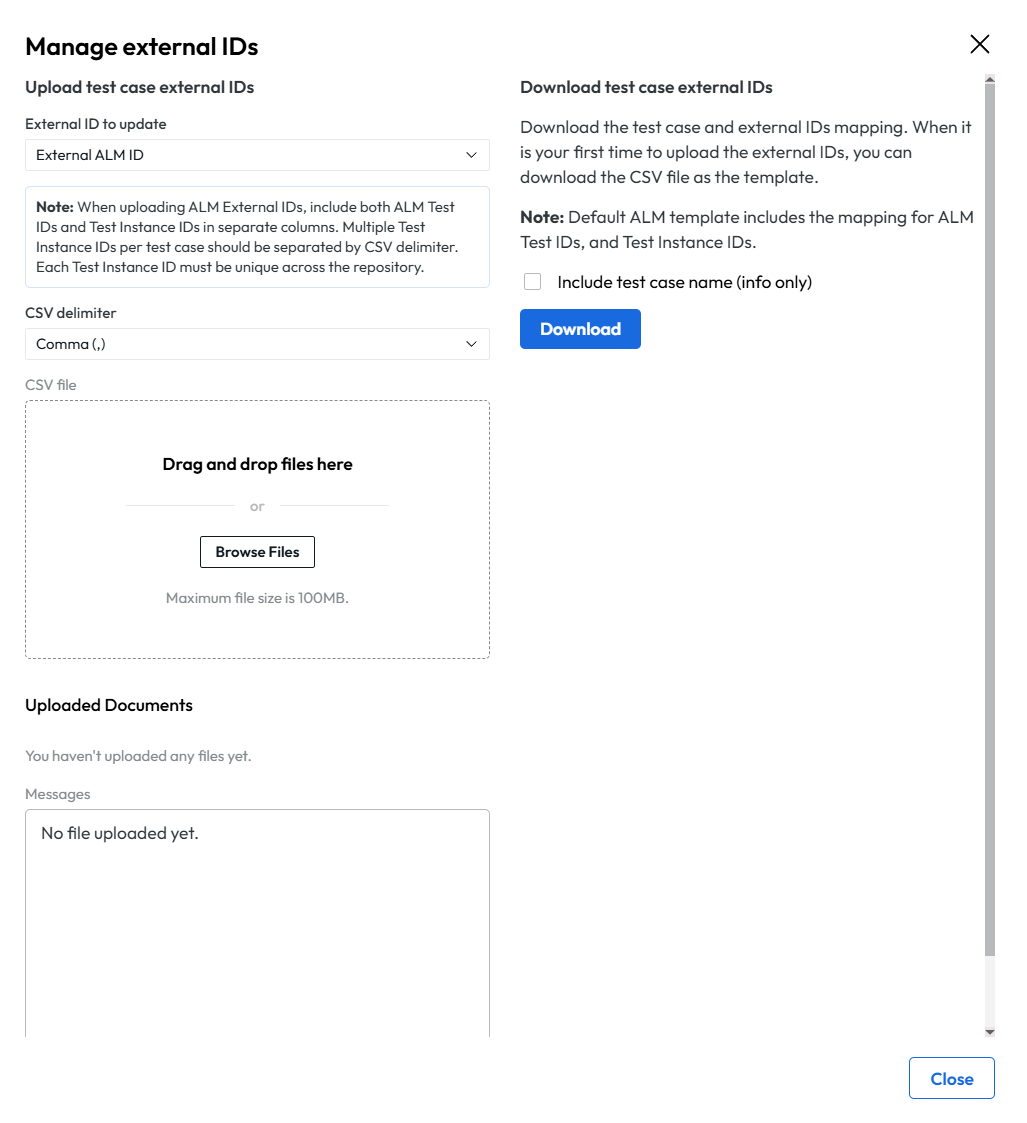
- Click on any test case in the repository tree to open the details panel and then click Manage External IDs.
- This dialog allows you to upload mappings via a CSV file. The CSV must contain the AST Test Case ID and the External Xray ID.
Sample Xray CSV Upload - Example content showing the required columns: AST Test Case ID and External Xray ID for bulk mapping:
AST Test Case ID,External Xray ID;
1,script-xray-id-1;
2,script-xray-id-2;
5,script-xray-id-5;
6,script-xray-id-6;
Scheduling and XRAY Synchronization
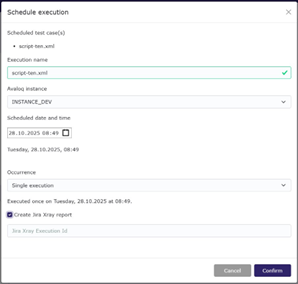
When a test run is scheduled, you must specify the unique Xray Execution ID that results will be synced to. This is different from the External Xray ID used for individual test cases.
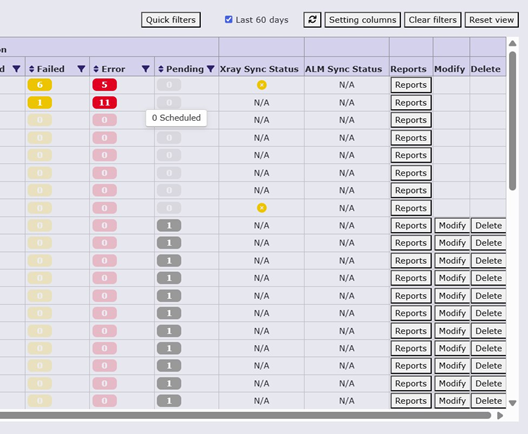
By default, the synchronization will be attempted 3 times with a timeout of 30 seconds for each attempt. If the synchronization fails after all attempts, the execution will be marked as completed with a failed sync status.
You can adjust the number of attempts and timeout duration by setting the environment variables AST_CONTROL_PANEL_INTEGRATION_XRAY_SYNC_ATTEMPTS and AST_CONTROL_PANEL_INTEGRATION_XRAY_SYNC_DURATION respectively.
Viewing Reports and Sync Logs
After a test run is complete, you can review its status and troubleshoot any issues.
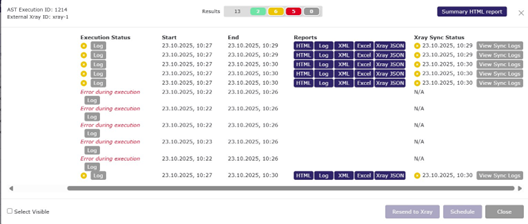
- View Sync Status: Click the executions table row for a completed execution to open a detailed view showing the test execution status and Xray sync logs.
- Detailed Logs: In the Reports pop-up window, you can see the synchronization status for each test case and click 'View Sync Logs' for detailed event records.
- Manual JSON Download: You can download the raw JSON payload sent to Xray by clicking the 'XRAY JSON' button in the 'Reports' dropdown. This file contains the execution results and metadata, which is useful for debugging.

Below is an example of a JSON payload sent to XRAY:
{
  "testExecutionKey": "xray-1",
  "tests": [
    {
      "testKey": null,
      "start": "2025-10-23T10:27:09+02:00",
      "finish": "2025-10-23T10:29:33+02:00",
      "status": "FAIL",
      "comment": "*Test Execution Info*\n || Key || Value ||\n | Testcase ID | 260 |\n  | Testcase Name | stex_13.xml |\n  | Testcase Link | 127.0.0.1:8080/testcase-repository/260 |\n  | Test Set ID | 41 |\n  | Test Set Name | reporting_test |\n  | Test Set Link | 127.0.0.1:8080/test-sets/41 |\n  | Execution Instance | INSTANCE_DEV |\n ",
      "evidences": [],
      "customFields": [
        {
          "id": "2",
          "value": "|| Type || User || Description || Operation Type || Err.Message || Status || CreationTime ||\n"
        },
        {
          "id": "1",
          "value": "127.0.0.1:8080/api/execution/scripts/ast/report/retrieve/by/deeplink/?reportDownloadKey=KN2jJBjKp2v8RLcbBbdWdiSAJpOMQBSFMRWLUdIDxcpuFzBckZ8xD4zPFomD7p4Az39god0GsCDbggUb9TMEVQM7rjm3hDAR8EeC&mimeTypeString=text%2Fhtml"
        }
      ]
    }
  ]
}