HP ALM
This chapter provides instructions for integrating HP ALM with the AST Control Panel. You will learn the necessary configuration steps, how to link test cases to external ALM IDs, map ALM instance IDs, and view the synchronization status for executed tests.
ALM Configuration
To enable HP ALM integration, an administrator must navigate to the configuration panel in the AST Control Panel and perform the following steps:
- Enable Integration: Ensure that
ast-control-panel.integration.alm.enabledis set totrue.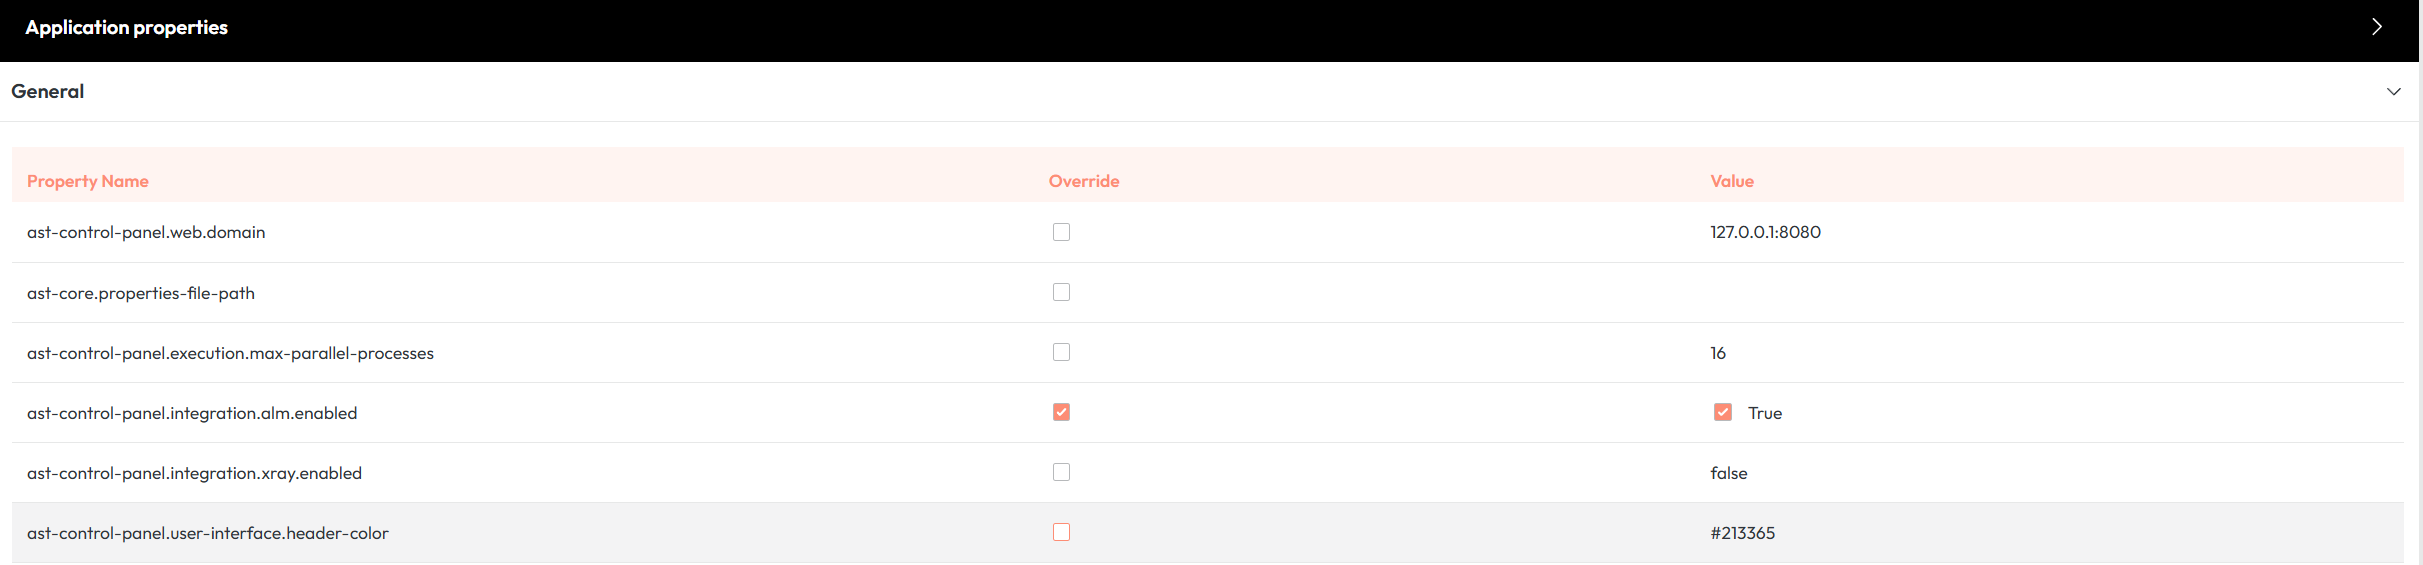
ast-control-panel.integration.alm.enabled setting activated for ALM integration.- Enter Connection Details: Input the required ALM configuration parameters, including the URL, domain, project name, username, and password.

Info
When setting the URL, use the URL without the qcbin part.
Setting Environment Variables (Optional)
The ALM session and login (authentication) endpoint can be changed by setting the environment variables AST_CONTROL_PANEL_ALM_SESSION_ENDPOINT and AST_CONTROL_PANEL_ALM_LOGIN_ENDPOINT.
By default, the session endpoint is set to /qcbin/rest/site-session and the login endpoint is set to /qcbin/authentication-point/alm-authenticate.
If your ALM instance uses different endpoints, you can set these environment variables accordingly. For instructions on how to set environment variables, please refer to the Setting environment variables documentation.
Assigning External ALM IDs to Test Cases
To link AST test cases to corresponding test entities in HP ALM, you must assign an External HP ALM ID.
- Individual Assignment:
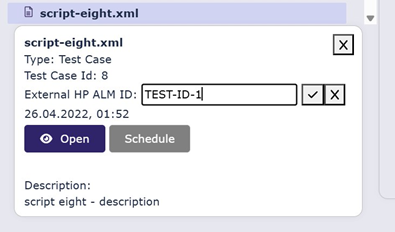
- Go to the 'Tests' tab and click on a specific test case.
- The test case details panel will open, showing a field where you can assign or edit the 'HP ALM ID'.
- Bulk Assignment (CSV Upload):
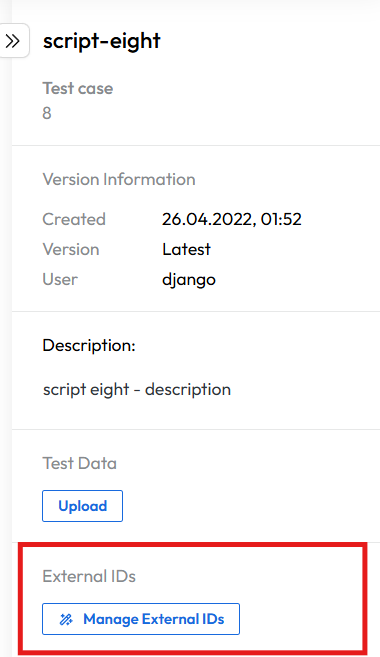
- Click on any test case in the repository tree to open the details panel.
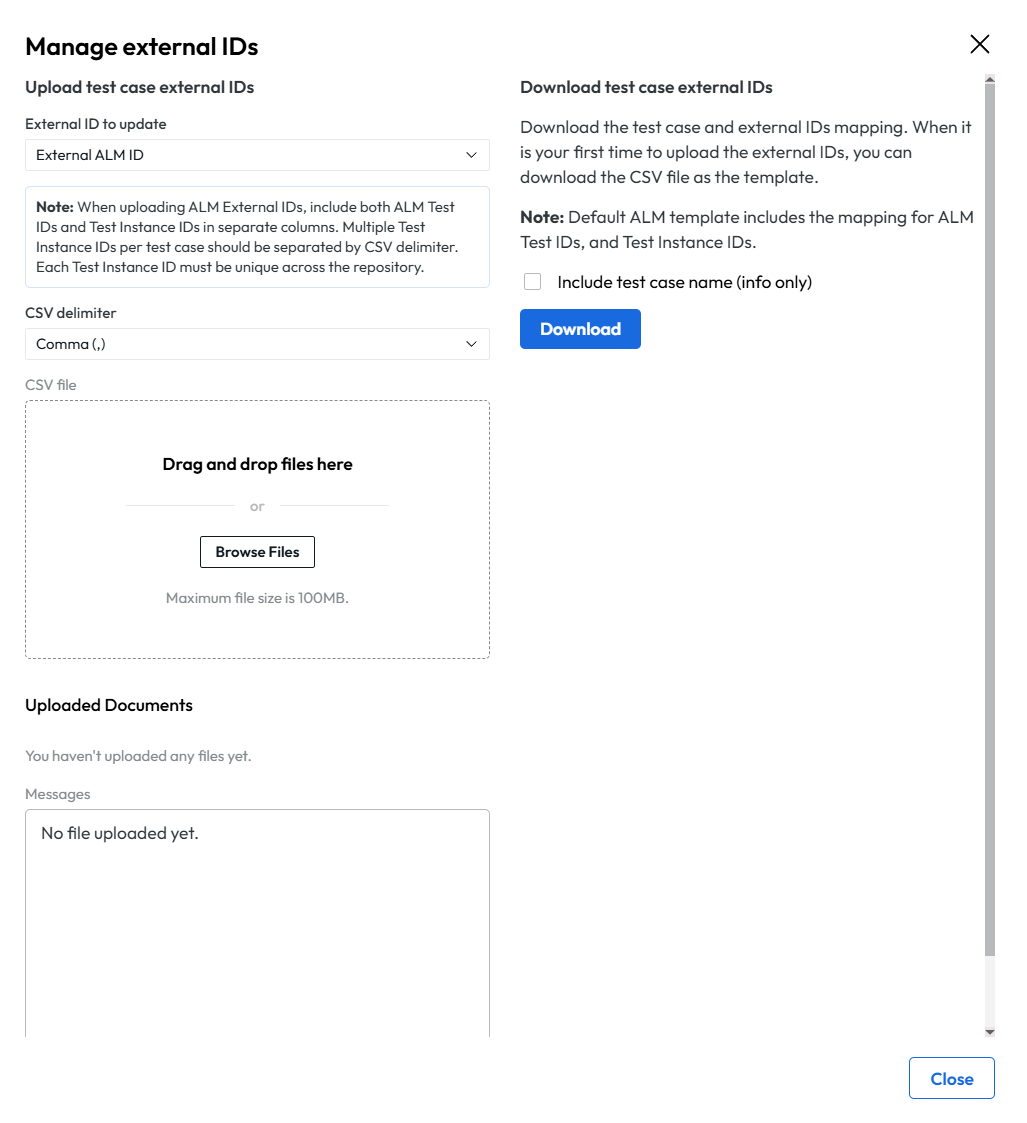
- Click on 'Manage External IDs'.
- This opens a dialog allowing you to upload the mappings via a CSV file. The CSV file must contain the AST Test Case ID, the External HP ALM ID, and optionally, ALM Instance Ids.
Sample CSV upload:
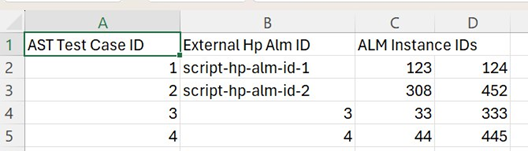
script-hp-alm-id-1), and ALM Instance Ids.Assigning ALM Instance IDs in Test Sets
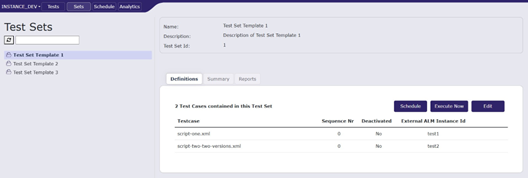
When executing tests in HP ALM, the synchronization requires an External ALM Instance Id to be associated with each test case within a Test Set.
- Go to the 'Sets' tab.
- Select a Test Set and navigate to the 'Definitions' section.
- Each listed test case must have a valid 'External ALM Instance Id' assigned.
- If a test case is missing this ID, you cannot schedule a synchronization with ALM. The ID can be assigned via a dropdown menu or added as a new entry.
Scheduling and ALM Synchronization
Once your test cases are linked to ALM IDs and organized in a Test Set, you can schedule the execution and initiate the synchronization process.
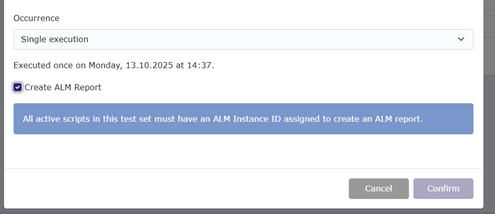
- Schedule the Run: When scheduling a test execution (either immediately or for a future time), ensure the ALM sync checkbox is selected in the scheduling dialog
Schedule execution dialog with the ALM sync checkbox selected, indicating that execution results will be synchronized with HP ALM.
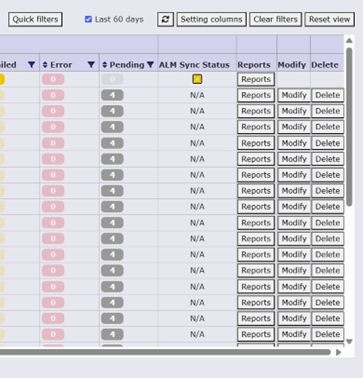
- Monitor Synchronization: After execution, the results and the synchronization status will be visible in the 'Executions' tab.
Executions view displaying a history of test runs, including columns for overall execution status and ALM sync status.
- View Sync Logs: Clicking on the table row for a completed execution opens a detailed view, which includes execution status and ALM sync logs
Detailed execution report with a link to the ALM Sync Log, providing information on the synchronization outcome.
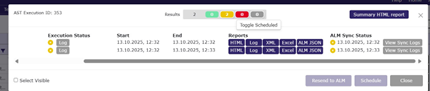
- Detailed Logs and Errors: Detailed logs, including the time, status, and any errors from the synchronization attempt, can be viewed in the log window panel in the detailed execution report showing the ALM Sync Logs with timestamps, status, and any troubleshooting information.
Sync Failures and Troubleshooting
If a synchronization fails, the AST Control Panel provides tools for troubleshooting and retrying the sync.
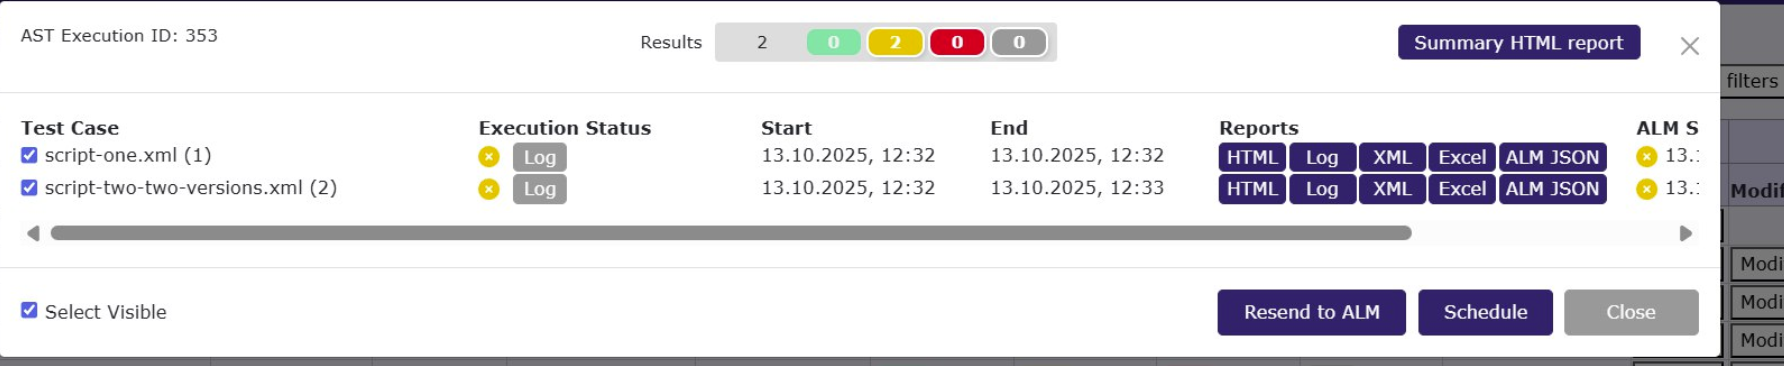
- Failure Icon: A failure icon will appear in the ALM Sync Status column for any failed synchronization.
- View Error Details: Clicking the 'Log' button provides the error details for the failed sync.

- Download JSON Payload: In the reports dropdown you can click the 'ALM JSON' button to download the raw JSON payload that was sent to ALM. This file can be used for manual upload or debugging the data structure.
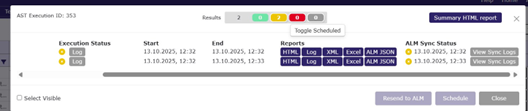
- Resend to ALM: To retry the synchronization after resolving the issue, select the failed test(s) and click the 'Resend to ALM' button.
Below is an example of a JSON payload sent to ALM:
{
  "Type": "run",
  "Fields": [
    {"values": [{"value": "Test Import from AST"}], "Name": "name"},
    {"values": [{"value": "admin"}], "Name": "owner"},
    {"values": [{"value": "script-hp-alm-id-1"}], "Name": "test-id"},
    {"values": [{"value": "test1"}], "Name": "testcycl-id"},
    {"values": [{"value": "Failed"}], "Name": "status"},
    {"values": [{"value": "hp.qc.run.MANUAL"}], "Name": "subtype-id"},
    {"values": [{"value": "2025-10-13"}], "Name": "execution-date"},
    {"values": [{"value": "12:32:59"}], "Name": "execution-time"}
  ]
}