Test Sets
The "Test Sets" menu on the AST Control Panel provides the organization of individual test cases into logical groups for streamlined, combined execution.
The menu has a structure similar to the test case repository. It is designed for efficiency, with the left side of the screen displaying a repository tree view of all available test sets. This whole menu is collapsible, so you can hide the tree view and use the whole screen for the content area if you want to focus on details of a specific test set.
Selecting an item from this tree populates the main content area with detailed information and options for that particular test set.
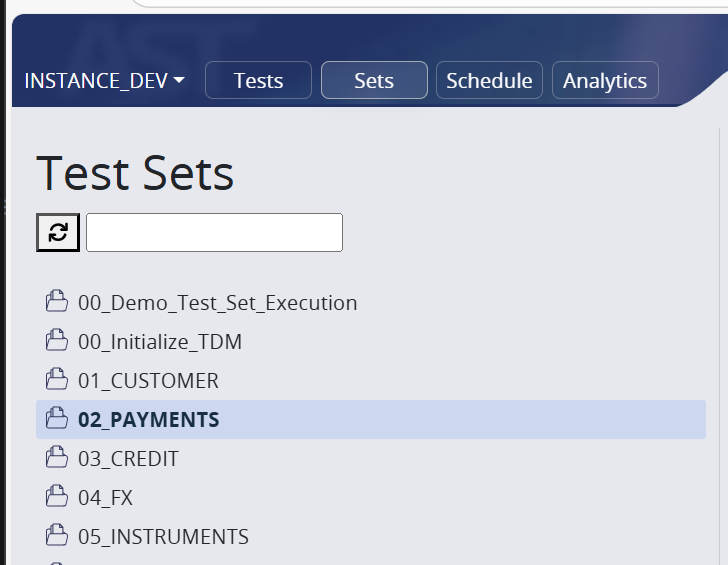
You can also filter the test sets. The results are loaded whilst you type characters one by one. Use the refresh button if you feel the tree isn't properly loaded.
Context menu
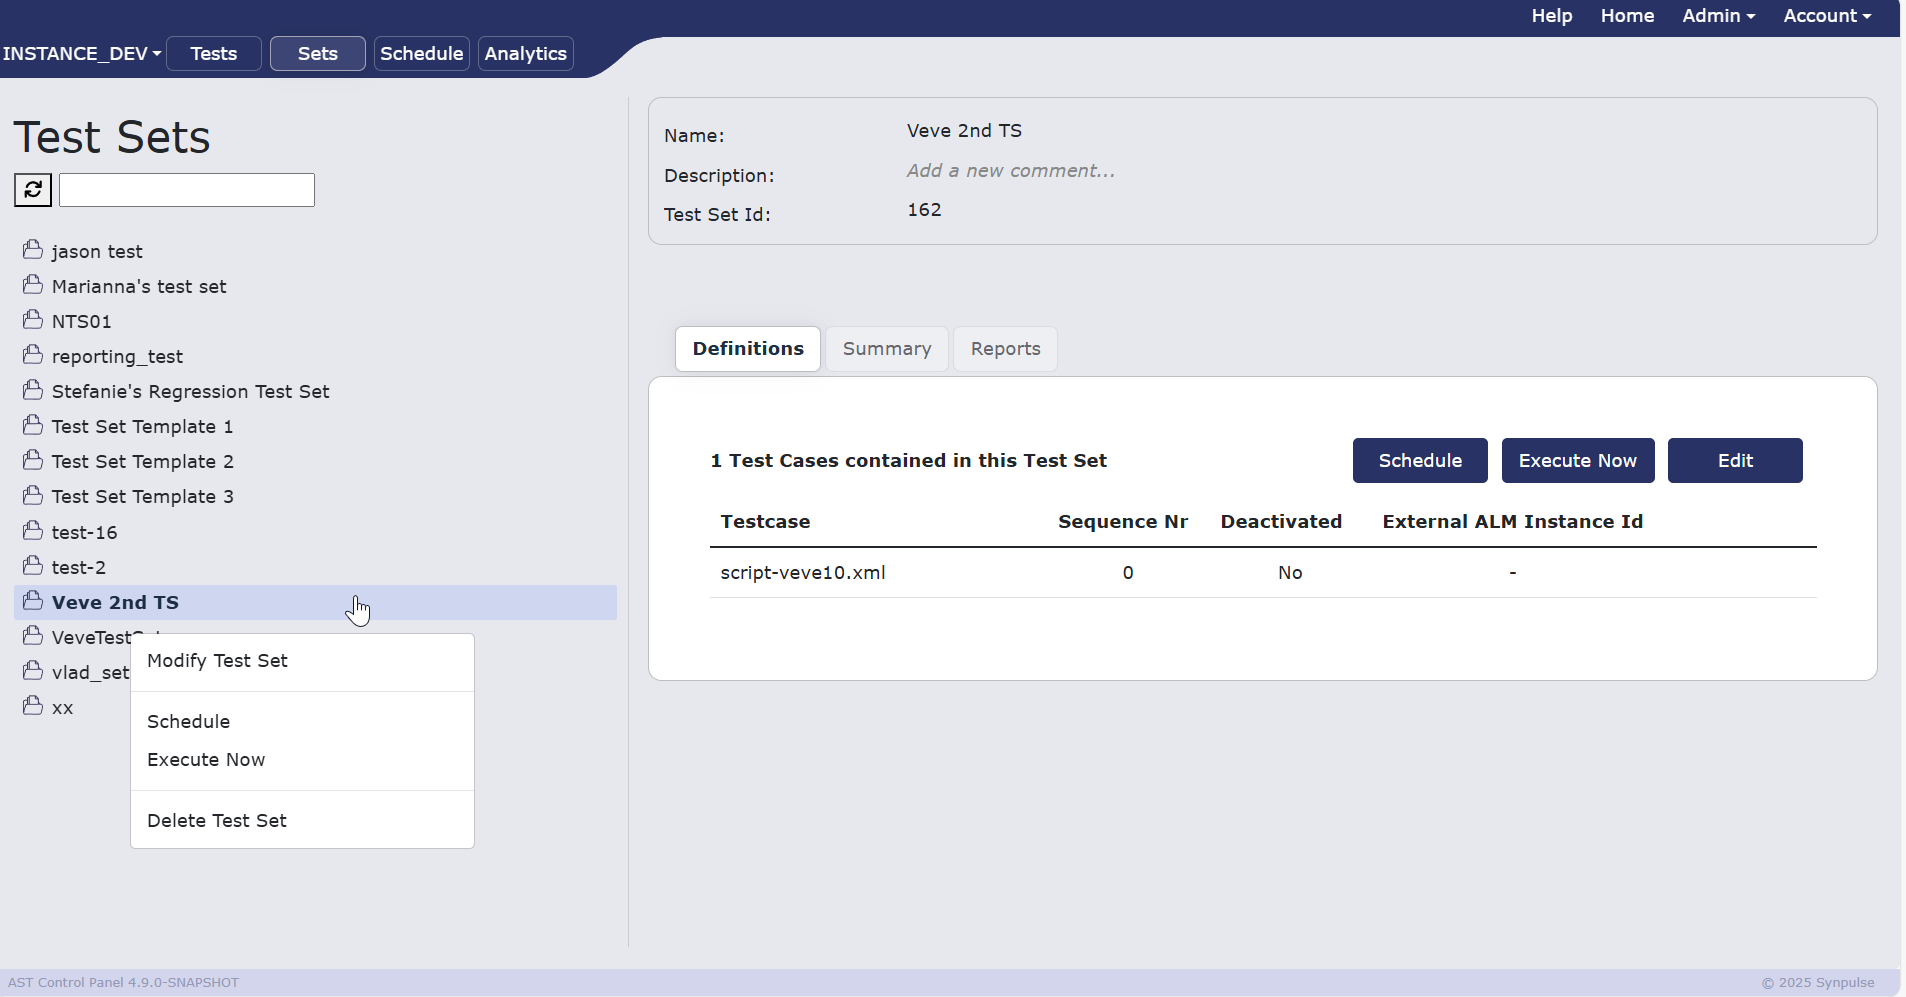
An important feature of this menu is the context menu, which appears when a user clicks on the three dots next to the test set in the repository tree. This menu offers several actions for managing the selected set.
| Action | Description |
|---|---|
| Modify Test Set Info | Allows user to change the name |
| Schedule | Allows the user to schedule an execution of test set |
| Execute Now | Immediate execution of test set |
| Delete Test Set | Deletes test set |
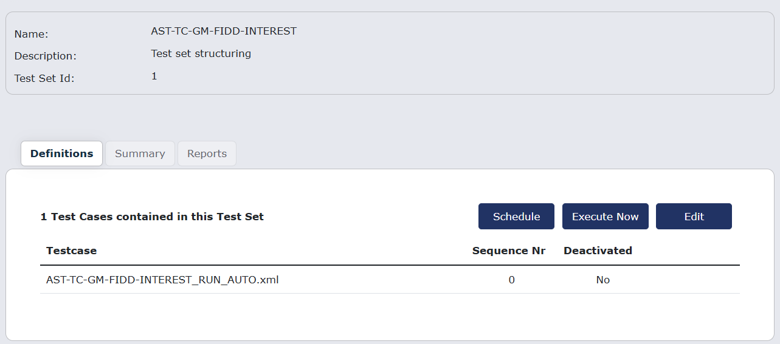
The primary content area is divided into two key sections. At the top, a metadata panel displays the Name, Description, and unique Test Set ID. This provides quick, high-level context about the selected set. Below this, a tabbed interface further organizes the information.
Definitions tab
The Definitions tab shown in the previous image lists all the individual test cases included in the test set. For each test case, it displays its name, execution sequence, and whether it is Deactivated. This organized table gives the user a clear view of which tests are part of the set and their execution order.
You can also see three buttons: Schedule, Execute Now and Edit. Schedule is used for scheduling the test set for a certain time.
Execute Now executes the testcase immediately. Edit button allows you to edit the test set: Adding/removing testcases, changing order of testcases etc.
Editing of test set
Adding/removing of test cases
Testcases can be added or removed from the test set via the Add test case button and removed by using the trash can icon.
The trash can icon always removes just one test case

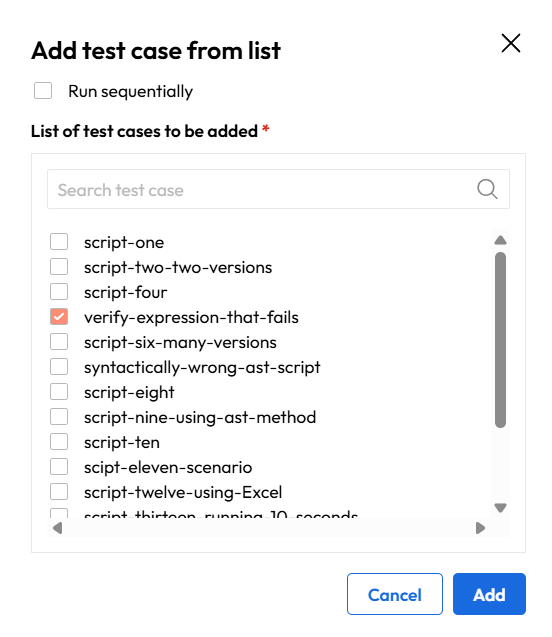
When adding testcases a dialog appears. In the Add Test Case dialog, test cases that are already included in the test set are preselected. To add new test cases, select them and click Add.
Important
Existing test cases are preselected; keep them checked if you want to retain them in the test set, as unchecking them will remove them.
If the Run sequentially checkbox is selected, new test cases are added as separate steps. If it is not selected, the new test cases are added together as a single parallel step.
Sequence of execution
Sequence can be parallel or sequential. In parallel execution, all test cases are executed simultaneously, while in sequential execution, test cases are executed one after the other in a specified order. The image below shows that the two testcases are set to execute in parallel as indicated by the line before the second testcase. The third testcase has a number next to it, which means that it will be executed after the first two testcases are finished.
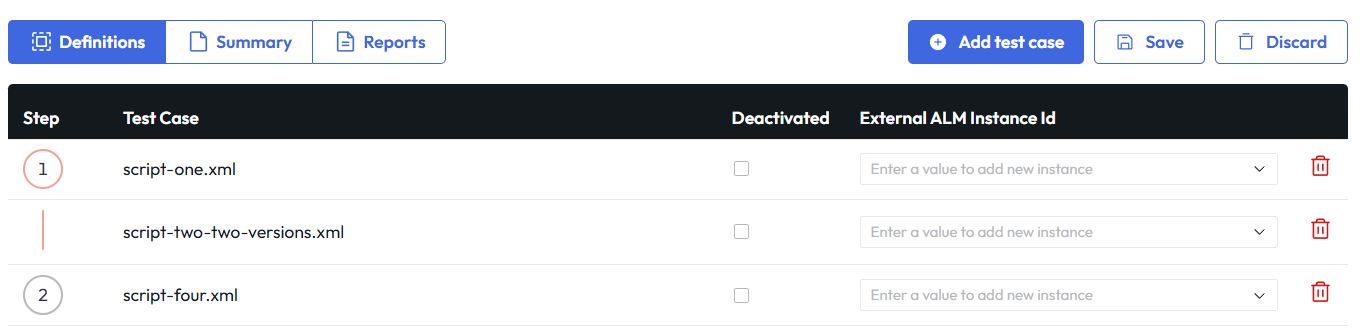
To group testcases into parallel or sequential execution you need to click the Edit button in the Definitions tab. Then you can use drag and drop to change the order of test cases and to group them into parallel or sequential execution.
To set testcase to execute in parallel you click on it and drag it on the testcase you want to execute in parallel with.
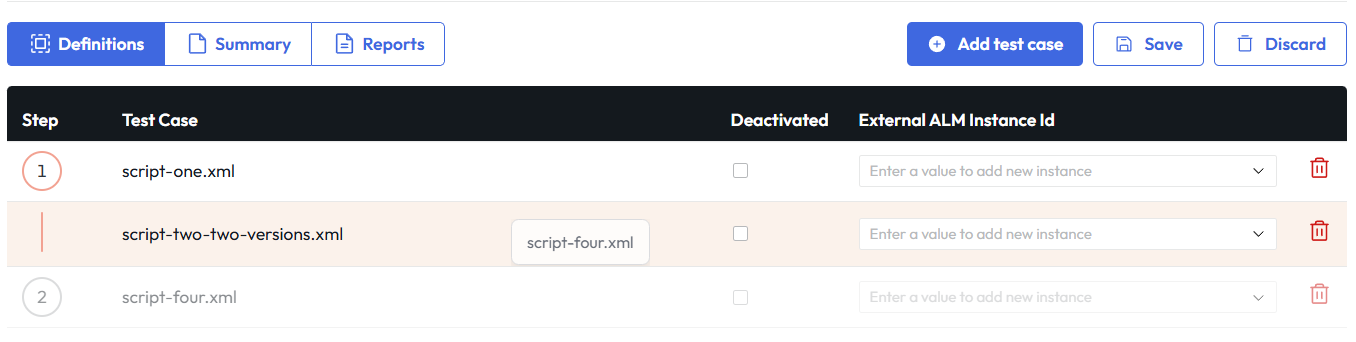
To set testcase to execute sequentially you click on it and drag it to the line between testcases until the line is highlighted. Then you drop it there, and it will be executed after the testcase above the line is finished.
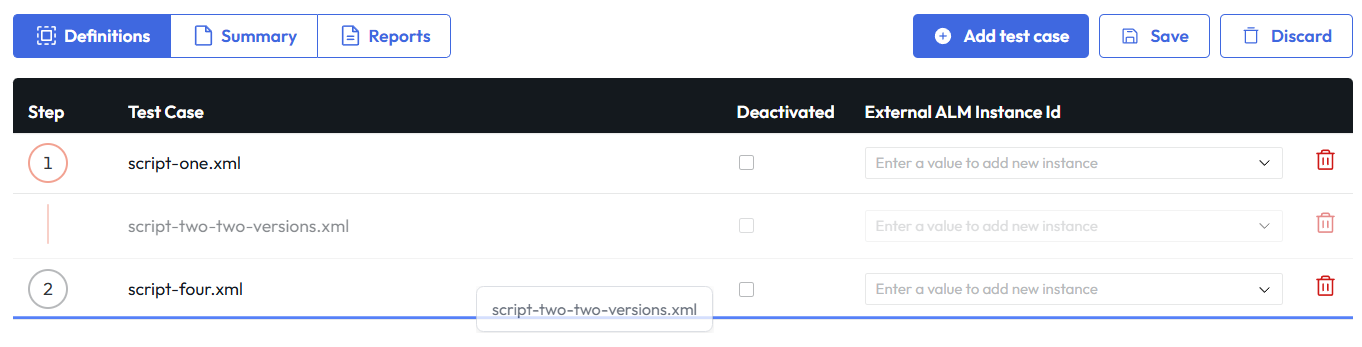
Stop execution on failure
You can select the Stop if fail checkbox for a test case so that if it fails, the remaining test cases in the set are skipped. When that happens, test cases with a higher sequence number are skipped and marked as failed in the execution report.

Info
We strongly recommend that you use Stop if fail for test cases that are executed in sequence.
In parallel execution, only the first checkbox is selectable; the other test cases in the same parallel group follow the same behavior as the first one. This is because test cases in a parallel group run at the same time, so their execution order cannot be guaranteed.
Important
If Stop if fail is enabled for a test case in a parallel group and that test case fails, the other test cases in the same parallel group are not skipped. This is because test cases in a parallel group run at the same time and share the same sequence number, so their execution order cannot be guaranteed. Only test cases with a higher sequence number than the failed test case are skipped.
Saving and discarding
Changes to test set can be discarded at any time using the Discard button. This will restore the last saved version of the test set.
To save changes you made to the test set you need to click on the Save button, otherwise the changes are not going to be saved.
Summary tab
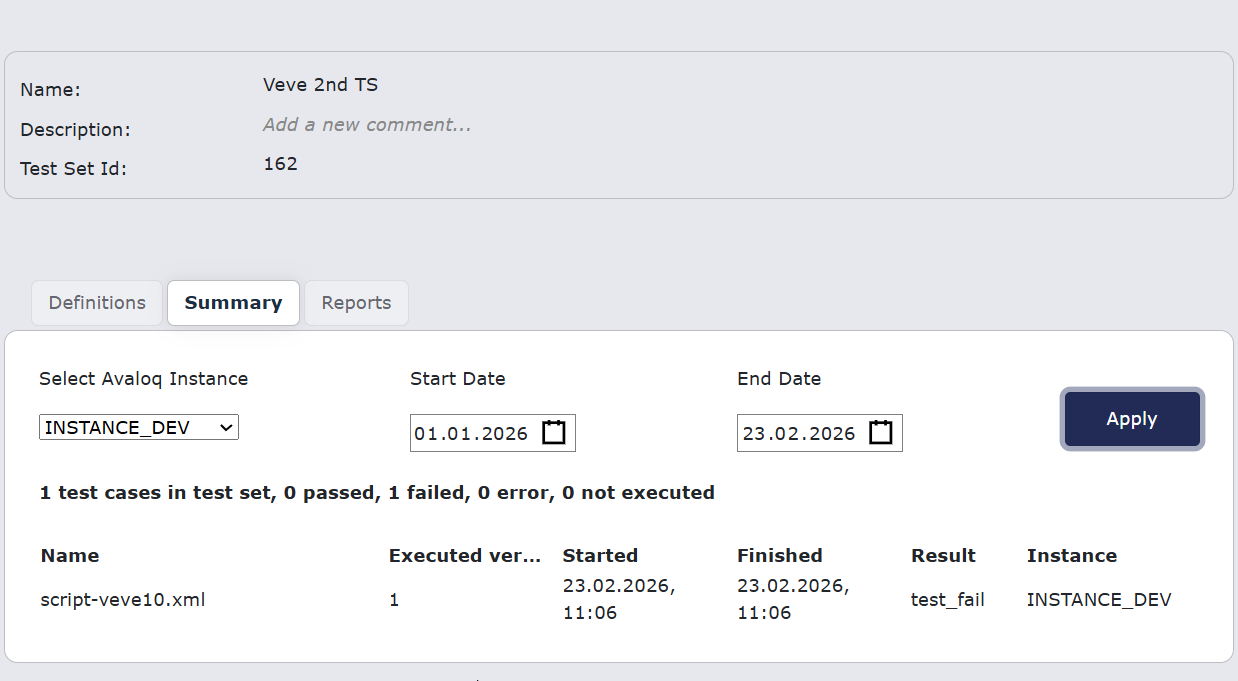
The Summary tab shown in the image below allows you to select the instance on which the selected test set was executed and the date range for which you want to see the summary.
Summary works as an overview. For more details, check the Reports tab.
Reports tab
The Reports tab contains the full table with many fields that can be set up for a different view.
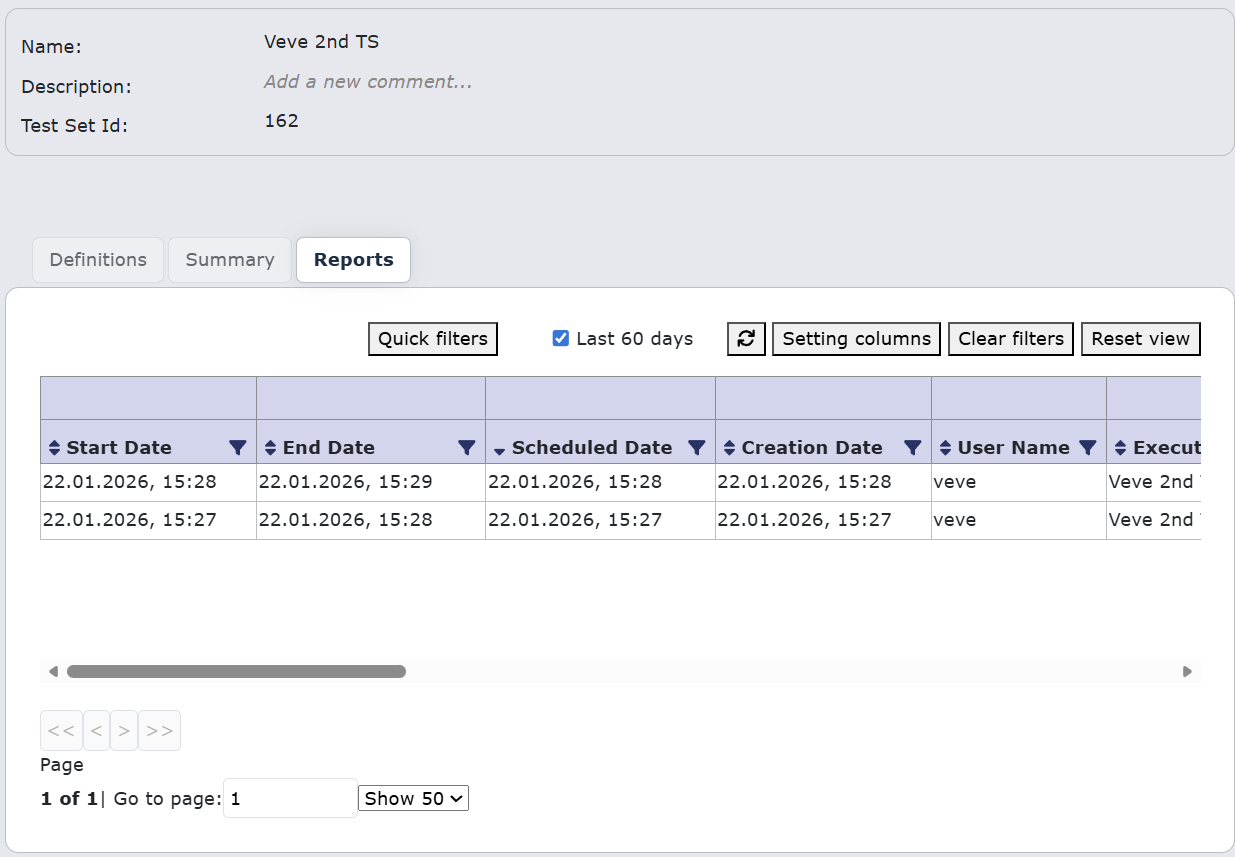
The table is designed to provide a comprehensive overview of all scheduled and executed test runs, allowing users to track the history and outcomes of their test executions effectively. The table columns organize data points to track the execution timeline and ownership. These include the Start Date, End Date, Scheduled Date, and Creation Date, allowing for tracking of initiation and completion times. Additional columns identify the User Name responsible for the run and the specific Test Set or test case that was executed. Each execution is uniquely identified by an Execution ID and has a specific Status, such as "Finished."
The table includes a summary of execution results, detailing the number of Tests:
-
Passed
-
Failed
-
Error
-
Scheduled
This numerical breakdown offers an immediate status of the execution outcome. The right-most columns provide action options, including viewing Reports and controls to Modify or Delete a scheduled run.
A separate detail window, accessed by clicking the desired row, provides a focused view of a single execution. At the top, a summary displays the total number of tests run and the breakdown of passed, failed, error, and pending results. A "Summary HTML report" button is available for a full report generation.
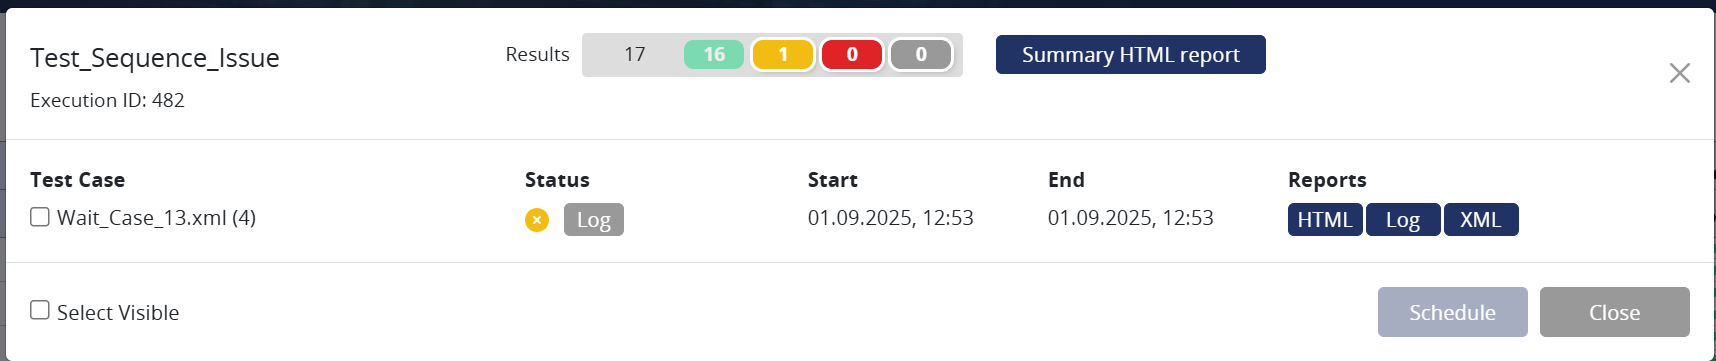
Granular execution report detail. This modal window displays the results breakdown and provides links to retrieve various report formats for in-depth analysis. For more details on the report formats, see the Reports section.
The window lists the individual Test Cases included in the run. For each case, the Status, Start time, and End time of its execution are listed. The Reports dropdown offers access to the execution data for that specific test case in the following formats: HTML, Log, XML, and Excel. This allows for granular review and data integration. The bottom of the window provides controls to Schedule the test run again or Close the report window.
Test set creation and alterations
Add new test set
To create a test set you can use the Create Test Set button in the Test Sets screen or you can use the Create New in the Tests screen. Then a dialog will appear where you can set up the name, description and select test cases that will be part of this set.
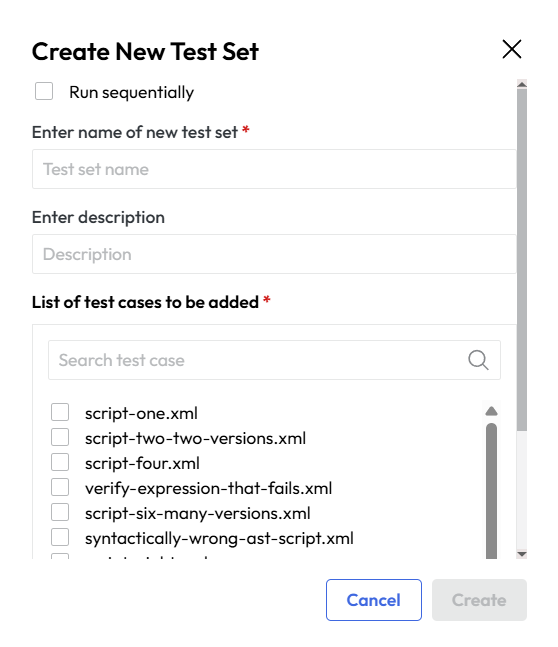
You can also use the context menu for the folders and testcases in the test case screen to create a new test set. In this case the same dialog appears but with already preselected testcase or all testcases from a folder.
Add test cases to already existing test set
In the Test set view in an open test set you can click on the Edit button in the Definitions tab. This will enable editing of the test set. Then you click on the Add test case button which will open a dialog from which you can select a test case that will be added to this set.
It also shows all the testcases that are present in this set. You can also remove test cases from this set by unchecking them in the list.
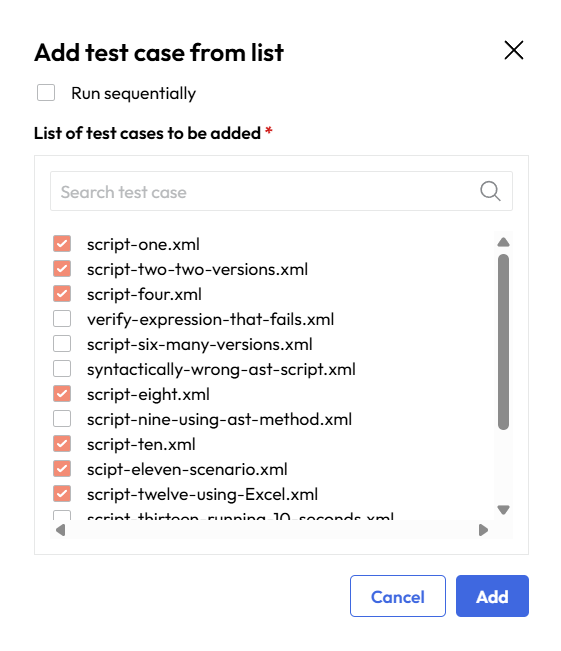
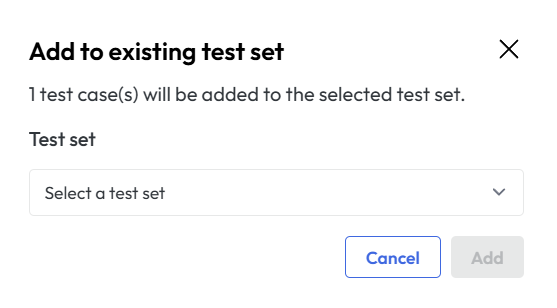
Another option is to use the context menu for the folders and testcases in the test case screen. Then you choose add to existing test set and then select the test set to which you want to add this test case or folder.
Scheduling and Executing Test Sets
If you want to execute a test set immediately, you can select 'Execute now' from the Definitions tab. This will run the test set on selected instance and show results in Reports tab.
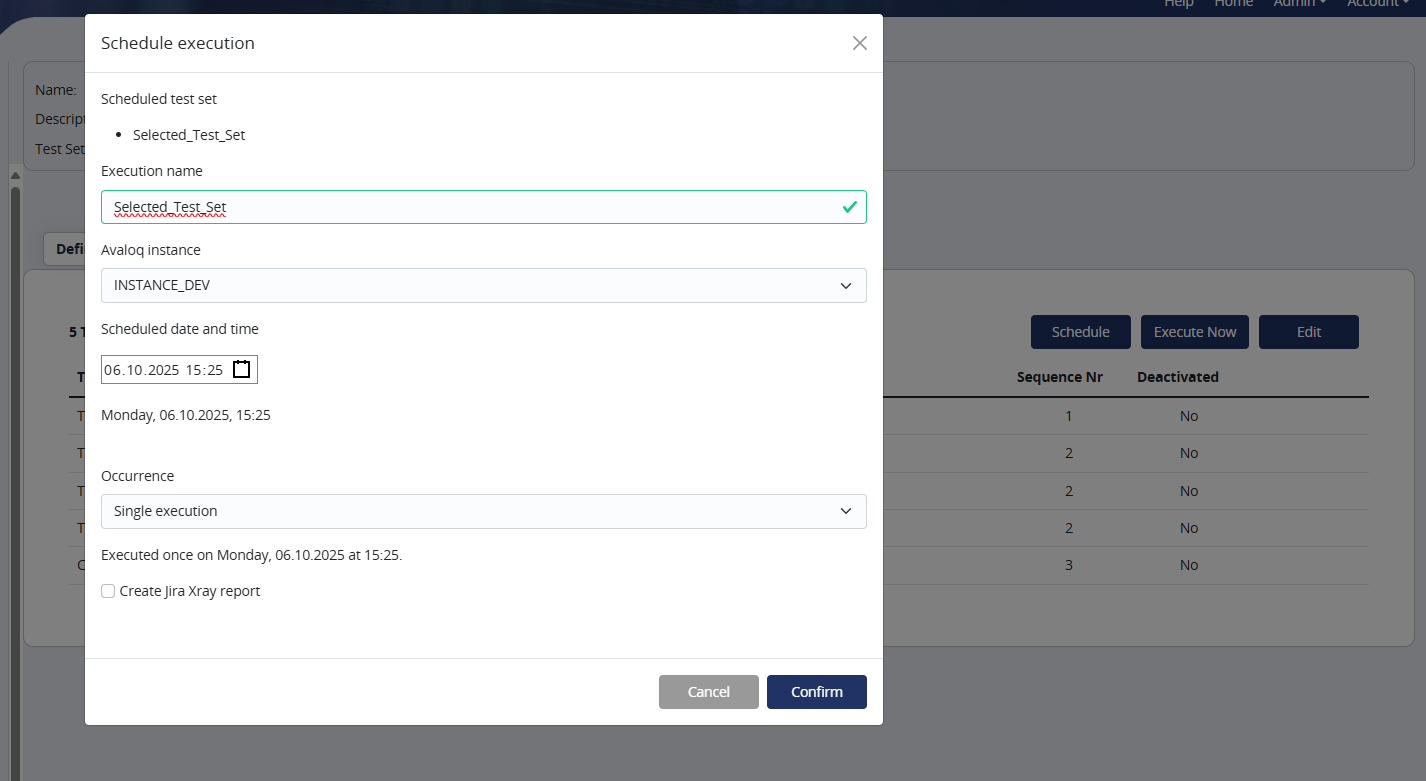
When clicking on the Schedule button a dialog will appear, allowing you to set up the parameters for scheduling the execution of the test set. You can select the specific test set and instance on which it will run, as well as the scheduled date and time for execution. Additionally, there are options to configure recurrence if you want the test set to run on a regular basis.
The interface consists of a detailed, scrollable table that functions as the central log for both scheduled and completed test runs, structured to provide a comprehensive record of execution history.
You will be able to see the scheduled execution in the table in the Executions tab.